Procreate Paper Canvas Overlay Brushes: A Practical Guide to Authentic Textures
Digital art has come a long way, yet many creators still crave the tactile warmth of traditional media. The sterile perfection of a digital screen can sometimes feel disconnected from the organic imperfections of physical paper or canvas. This is where Procreate Paper Canvas Overlay Brushes become an essential tool in your creative arsenal. These specialized brushes are designed not to paint with color, but to apply texture, grain, and depth to your existing artwork, mimicking the look of old paper, recycled stock, watercolor surfaces, and woven canvas.
However, simply downloading a bundle of textures is not enough to guarantee professional results. Many artists, from beginners to seasoned professionals, make avoidable errors when selecting and applying these overlays. Understanding the nuances of how these brushes interact with Procreate’s engine is crucial for achieving that coveted "real look" without compromising the integrity of your original illustration.
Understanding Compatibility and Installation Pitfalls
The most immediate hurdle for new users is often technical rather than artistic. It is vital to understand that Procreate Paper Canvas Overlay Brushes are exclusively compatible with the Procreate app on iPad. They will not function in Photoshop, Clip Studio Paint, or other desktop software. Attempting to use them elsewhere leads to frustration and wasted time.
A common mistake occurs during the installation process. After purchasing your bundle, you will receive a compressed file, typically a .zip archive. Many users try to import this file directly into Procreate, which fails because the app cannot read compressed archives. You must first unzip the file on your device. Once extracted, you need to send the individual .brushset or .procreate files to your tablet. When you tap on the unzipped file, it should automatically transfer to your Procreate brush library. If you skip the unzipping step or attempt to email the zip file directly to the app without extraction, the brushes will not appear. Taking a moment to ensure proper file management saves significant troubleshooting later.
The Misconception of One-Size-Fits-All Textures
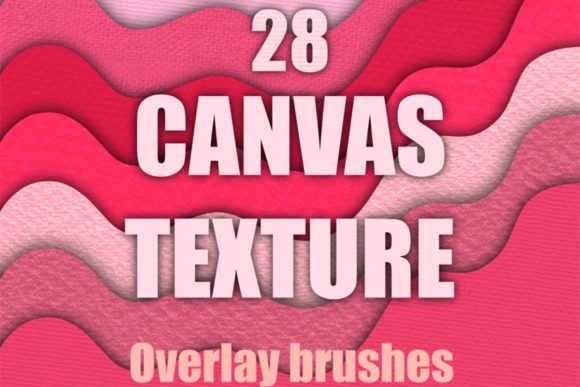
Another frequent oversight is assuming that any paper texture will suit every piece of art. Your bundle likely includes a diverse range of options: rough watercolor paper, smooth recycled stock, coarse canvas, and aged parchment. Using a heavy, high-contrast canvas texture on a delicate portrait can overwhelm the subject, while using a subtle watercolor grain on a bold graphic design might render the texture invisible.
To avoid this, consider the mood and medium you are emulating. If you are creating a vintage-style illustration, an old paper overlay with slight discoloration and fiber details adds authenticity. For modern, clean designs, a subtle recycled paper texture provides just enough tooth to break up digital flatness without distracting from the content. Always test multiple textures from your bundle on a duplicate layer before committing to one. This allows you to compare how each interacts with your specific color palette and line work.
Layering Errors and Blend Mode Confusion
Even with the right brush selected, incorrect layer settings can ruin the effect. A major error is applying texture brushes on the same layer as your artwork. This permanently alters your pixels, making it impossible to adjust the intensity or remove the texture without damaging the underlying drawing. Always create a new layer above your artwork specifically for the texture overlay.
Furthermore, leaving the blend mode on "Normal" often results in a muddy, opaque look that obscures your art. To achieve a realistic integration, experiment with blend modes such as Multiply, Overlay, or Soft Light. Multiply darkens the underlying colors based on the texture’s darkness, ideal for simulating ink absorption on rough paper. Overlay enhances contrast, making the texture pop against both light and dark areas. Adjusting the layer opacity is also critical; a 100% opaque texture rarely looks natural. Dialing it back to 30–50% often yields a more subtle, professional finish that suggests texture rather than shouting it.
Legal and Ethical Usage Considerations
It is important to address the licensing terms associated with your purchase. The creator, Resi, explicitly states that it is not allowed to sell these brushes. This means you cannot redistribute the .brushset files, include them in your own asset packs, or sell them as standalone products. However, you are generally free to use the textures in your finished artwork for commercial projects, such as prints, client commissions, or social media content. Clarifying this distinction prevents legal issues and respects the intellectual property of the brush creator. If you have any questions regarding specific usage rights, reaching out to the creator directly is the best course of action.
Optimizing Workflow for Efficiency
For freelancers and small business owners, time is money. Inefficient use of texture brushes can slow down your workflow. Instead of manually painting texture over every inch of your canvas, consider using the brushes to create custom patterns or stamps that can be reused. Additionally, saving your favorite texture layers as presets within Procreate allows you to apply consistent branding across multiple projects. This is particularly useful for marketers and bloggers who need a cohesive visual style across various platforms.
When evaluating the quality of your Procreate Paper Canvas Overlay Brushes, look for seamless tiling capabilities if you plan to cover large backgrounds. Poorly designed brushes may show repetitive patterns or obvious edges, breaking the illusion of reality. High-quality bundles, like the one described, offer varied textures that minimize repetition and provide a natural, organic feel.
Making the Right Choice for Your Artistic Goals
Before finalizing your decision to use these overlays, ask yourself what problem you are trying to solve. Are you trying to add depth to a flat vector-style illustration? Do you want to mimic the aesthetic of traditional watercolor without the mess? Or are you looking to give digital sketches a hand-drawn, analog feel? Your answer will dictate which textures from the bundle you prioritize.
Remember that texture should support your narrative, not dominate it. If the viewer notices the texture before the subject, you may have applied it too heavily. Start subtle, build up gradually, and always zoom out to view your artwork at its intended display size. What looks detailed at 100% zoom may disappear entirely on a mobile screen, requiring you to increase the intensity slightly for smaller formats.
In conclusion, Procreate Paper Canvas Overlay Brushes are a powerful tool for bridging the gap between digital precision and traditional charm. By avoiding common installation errors, choosing the right texture for the right context, utilizing proper layering techniques, and respecting licensing agreements, you can elevate your digital art to new heights. Whether you are a hobbyist exploring new styles or a professional refining your brand identity, these overlays offer a versatile solution for adding authentic, tactile quality to your work.